Your kitchen backsplash tile does way more than just protect your walls from spaghetti sauce splatters. It’s like the perfect accessory that pulls your whole kitchen together – think of it as jewelry for your cooking space! Whether you’re building your dream home in Connecticut or giving your current kitchen a makeover, choosing the right backsplash can totally transform how your kitchen looks and feels.
Living in Connecticut means dealing with everything from humid summers to cold winters, and your backsplash needs to handle it all while still looking amazing. The good news? With over 15 years of experience helping homeowners across Connecticut, Rhode Island, and New York create stunning kitchens, we’ve learned exactly what works best in New England homes.
In this guide, we’ll walk you through everything you need to know about kitchen backsplash tiles – from picking the perfect material to understanding costs and installation. By the time you’re done reading, you’ll know exactly how to create a backsplash that not only protects your walls but also makes your kitchen the star of your home.
Understanding Kitchen Backsplash Tiles: The Basics
Let’s start with the simple stuff. A kitchen backsplash is that section of wall between your countertop and your upper cabinets. It’s usually about 18 inches tall, though some people love to go all the way up to the ceiling for a dramatic look. This area gets hit with all sorts of kitchen action – steam from boiling pasta, oil splashes from frying bacon, and the occasional tomato sauce explosion.
But here’s where it gets interesting – your backsplash isn’t just about protection. It’s actually one of the best places to show off your style without breaking the bank. Think about it: it’s a relatively small area compared to your whole kitchen, but it’s right at eye level where everyone can see it. That means you can splurge on those fancy tiles you love without needing a second mortgage!
The best part about kitchen backsplash tiles is how they bring everything together. They create a bridge between your countertops and cabinets, making your whole kitchen look planned and put-together. Plus, unlike painted walls that can stain and need repainting every few years, quality tiles can look amazing for decades with just basic cleaning.
Popular Kitchen Backsplash Tile Materials
Subway Tiles: The Classic Choice
Subway tiles are like the little black dress of the kitchen world – they never go out of style! These rectangular tiles (usually 3×6 inches) got their name from being used in New York City subway stations over 100 years ago. Today, they’re probably the most popular choice for kitchen backsplashes, and for good reason.
What makes subway tiles so special? First, they’re super versatile. You can arrange them in different patterns – straight across (called running bond), stacked like bricks, or even in a herringbone pattern for something fancier. They come in tons of colors too, from classic white to bold navy blue or even metallic finishes. The smooth surface makes them really easy to clean – just wipe and go!
For Connecticut homes, subway tiles work especially well because they fit with both traditional New England style homes and modern designs. They typically cost between $2 to $15 per square foot, making them budget-friendly without looking cheap. Many of our clients in Darien and across Connecticut choose subway tiles because they know they’ll still love them in 10 years.
Natural Stone: Bringing Nature Indoors
Natural stone backsplashes bring a piece of the earth right into your kitchen. We’re talking about materials like marble, granite, travertine, and slate – each one unique with its own patterns and colors that nature created over millions of years. No two pieces are exactly alike, which means your kitchen will be truly one-of-a-kind.
Marble is the luxury superstar of natural stone. Those beautiful veins running through white or gray stone? Pure elegance! But here’s the thing – marble needs a bit more love and care. It’s porous (has tiny holes), so it needs to be sealed regularly to prevent stains. Granite is tougher and easier to maintain, making it perfect for busy kitchens where you’re actually cooking every day.
The cost for natural stone typically ranges from $10 to $50 per square foot, depending on what type you choose. Yes, it’s pricier than other options, but many homeowners see it as an investment. Natural stone can increase your home’s value, and when properly maintained, it literally lasts forever. Plus, there’s something special about having a piece of actual mountain or quarry in your kitchen!
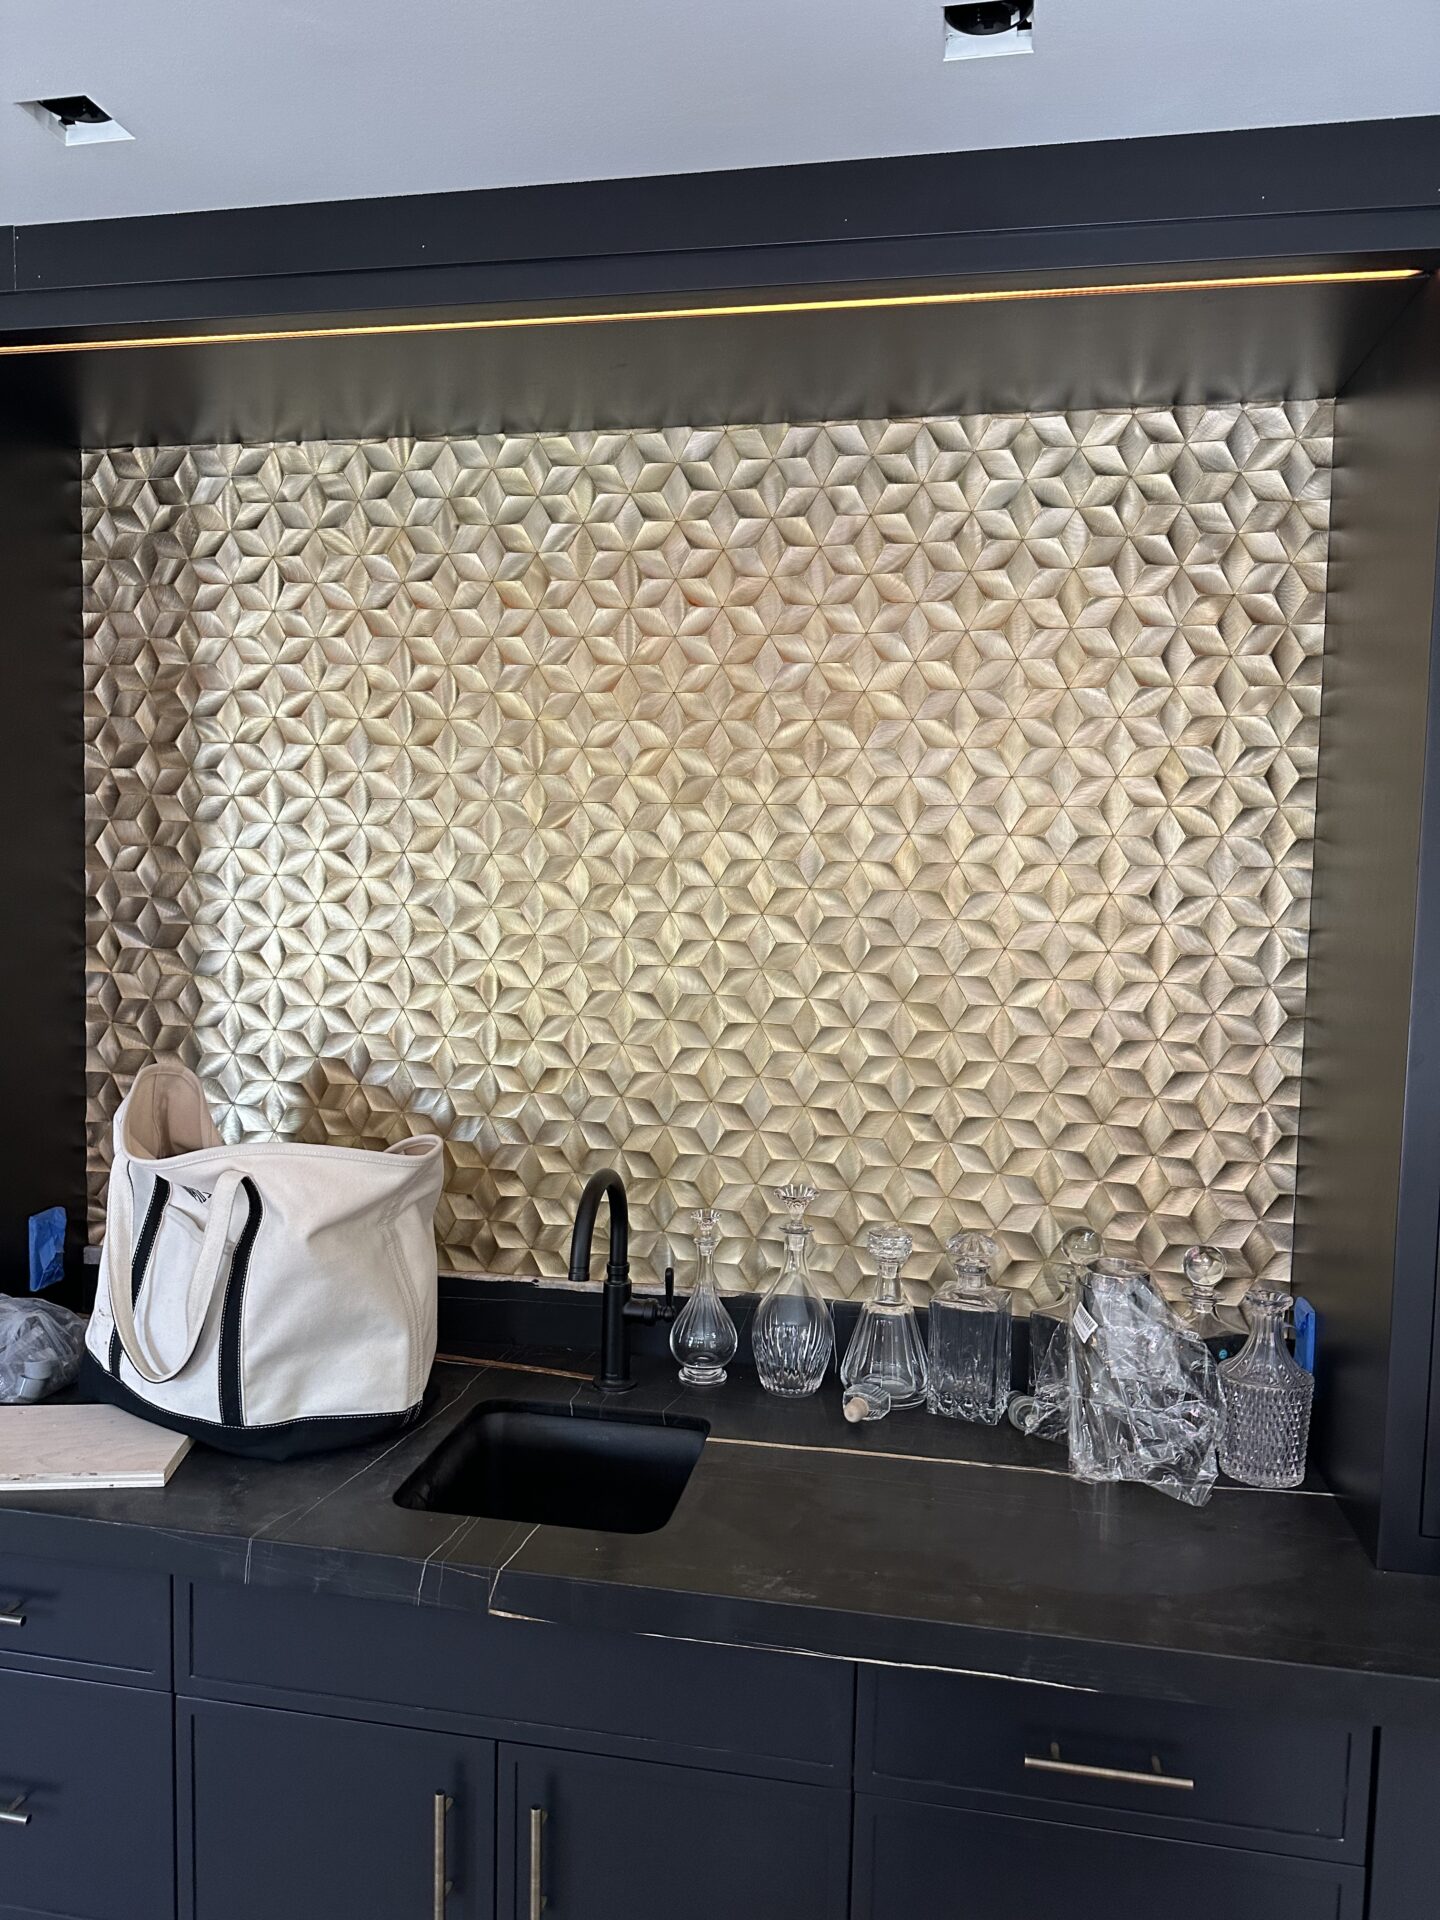
Glass Tiles: Modern and Bright
Glass tile backsplashes are like adding jewelry to your kitchen – they sparkle, reflect light, and can make your whole space feel bigger and brighter. These tiles come in every color you can imagine, from ocean blues to sunset oranges, and they can be clear, frosted, or even iridescent (that means they change color depending on how light hits them).
One of the coolest things about glass tiles is how they play with light. In a kitchen with limited natural light – pretty common in Connecticut’s older homes – glass tiles can help bounce light around the room. They’re also non-porous, which means they won’t absorb stains or odors. Spill some curry sauce? No problem – it wipes right off without leaving a trace.
Glass tiles usually cost between $7 to $30 per square foot. They’re a bit trickier to cut during installation (they can chip if not done carefully), so you’ll want to work with experienced installers like the team at Tri State Tiling. But once they’re up, they’re incredibly durable and can handle the heat from your stove without any problems.
Porcelain and Ceramic: The Practical Favorites
Porcelain and ceramic tiles are the workhorses of the backsplash world. They’re tough, affordable, and come in so many styles that they can mimic almost any other material – from wood to marble to concrete. The main difference? Porcelain is denser and less porous than ceramic, making it even more water-resistant.
What’s really exciting about modern porcelain and ceramic is the technology behind them. Manufacturers can now print incredibly realistic patterns on these tiles. Want the look of expensive Carrara marble without the price tag or maintenance? There’s a porcelain tile for that! Love the warmth of wood but need something waterproof? Yep, they make that too.
These tiles typically cost between $3 to $20 per square foot, making them one of the most budget-friendly options. They’re also super practical for Connecticut’s climate – they handle temperature changes well and won’t crack from your kitchen’s daily temperature swings. Plus, if one tile ever gets damaged (though it’s rare), it’s relatively easy to replace just that one piece.
Kitchen Backsplash Tile Costs Breakdown
Let’s talk money – because knowing what to expect cost-wise helps you plan better and avoid surprises. The total cost of your kitchen backsplash tile project depends on three main things: the tiles themselves, labor for installation, and any extras like special trim pieces or patterns.
For materials, here’s what you’re looking at for an average 30-square-foot backsplash: Budget-friendly ceramic tiles might cost you $90 to $300 total. Mid-range options like quality subway tiles or basic natural stone run $300 to $900. If you’re going luxury with high-end marble or designer glass tiles, you could spend $900 to $1,500 or more. Remember, these are just for the tiles – you’ll also need grout, adhesive, and possibly backer board.
Labor costs in Connecticut typically run $40 to $60 per hour, or about $10 to $15 per square foot installed. A professional can usually install a standard backsplash in one to two days. Complex patterns like herringbone or mosaic designs take longer and cost more. Don’t forget to factor in extras like removing old tile ($3-5 per square foot), adding electrical outlet extenders ($20-40 each), or waterproofing ($2-3 per square foot).
Design Tips for Connecticut Kitchens
Connecticut homes have their own special character – from colonial-style houses in Greenwich to modern waterfront properties in Westport. Your kitchen backsplash tile should complement your home’s style while also being practical for our New England lifestyle.
For traditional Connecticut homes, consider classic patterns with a twist. White subway tiles with dark grout create a timeless look that works beautifully with both painted and wood cabinets. Add interest by using a herringbone or basket weave pattern, or mix in some accent tiles for personality. Natural stone like tumbled marble or travertine also fits perfectly with the historic charm of many Connecticut homes.
If you have a more contemporary space, think about large-format tiles (12×24 inches or bigger) for a clean, modern look with fewer grout lines. Geometric patterns using hexagonal or arabesque tiles are super trendy right now. For waterfront properties, glass tiles in ocean blues and greens can bring the outside in, creating a cohesive flow between your kitchen and those beautiful Connecticut water views.
Kitchen Backsplash Tile Cost & Timeline Guide
Material Cost Comparison
Installation Timeline
| Day | Task | Duration |
|---|---|---|
|
1
|
Remove old backsplash & prep walls | 3-4 hours |
|
2
|
Install tiles & let adhesive set | 6-8 hours |
|
3
|
Grout, seal & final cleanup | 4-5 hours |
Quick Cost Calculator
Installation Process: What to Expect
Installing a kitchen backsplash tile might seem simple – just stick tiles on the wall, right? Well, there’s actually a bit more to it! Understanding the process helps you know what to expect and why hiring professionals like Tri State Tiling often makes sense.
The first step is preparation, and this is super important. Your installer will protect your countertops and appliances with plastic sheeting. They’ll check if your walls are flat (uneven walls make tiles look wonky) and might need to install cement backer board for extra moisture protection. This is especially important in Connecticut where humidity levels change a lot throughout the year. Any electrical outlets in the backsplash area need their power turned off and might need extenders to sit flush with the new tile surface.
Next comes the actual tile installation. Your installer will start by doing a “dry layout” – arranging tiles without adhesive to plan the pattern and figure out where cuts are needed. They’ll apply adhesive (called thinset) to the wall in small sections, then press each tile in place with spacers between them to keep gaps even. This is where experience really matters – knowing how much adhesive to use and how to keep everything level takes practice. The tiles need to set for at least 24 hours before the next step.
The final phase is grouting and sealing. Grout fills the spaces between tiles and comes in tons of colors – choosing the right one can totally change your backsplash’s look! After applying grout and cleaning off excess, many tiles (especially natural stone) need sealing to protect them from stains. The whole process typically takes 2-3 days from start to finish, though complex patterns or large kitchens might take longer.
Maintenance Tips for Long-Lasting Beauty
Once your beautiful new kitchen backsplash tile is installed, keeping it looking great is actually pretty easy – if you know what to do. Different materials need slightly different care, but most backsplashes just need regular cleaning and occasional maintenance to stay gorgeous for years.
For daily cleaning, warm water and mild dish soap work great for most tiles. Use a soft cloth or sponge – never anything scratchy that could damage the surface or grout. Glass and glazed tiles can handle glass cleaner for extra shine. Natural stone needs gentler treatment – avoid acidic cleaners like vinegar or lemon juice, which can etch (damage) the surface. Instead, use cleaners specifically made for stone, or just stick with mild soap and water.
Grout needs its own attention since it’s porous and can stain or grow mildew if neglected. Clean grout lines monthly with a soft brush and either a baking soda paste or specialized grout cleaner. Every year or two, apply a grout sealer to keep it protected – it’s like putting a raincoat on your grout! If you have natural stone tiles, they’ll need resealing too, usually once a year. You can test if it’s time by dropping some water on the tile – if it soaks in instead of beading up, time to reseal!
Choosing the Right Kitchen Backsplash Tile for Your Home
Picking the perfect kitchen backsplash tile means thinking about both your practical needs and your style dreams. Start by considering your lifestyle. Do you cook elaborate meals every night, creating lots of splashes and steam? You’ll want something super easy to clean like glass or glazed ceramic. Have young kids who turn the kitchen into an art studio? Skip the white grout and go for darker colors that hide stains better.
FAQs
How much does it cost to install a kitchen backsplash tile in Connecticut?
The total cost typically ranges from $800 to $2,500 for an average kitchen, including materials and professional installation. Budget tile options with DIY installation can cost as little as $200, while high-end materials with professional installation can exceed $3,000.
Can I install a backsplash over existing tile?
Yes, you can install new tiles over existing ones if they’re firmly attached and the surface is level. However, this adds thickness that might cause issues with outlets and switch plates, and it’s usually better to remove old tile first for the best, longest-lasting results.
How long does a kitchen backsplash tile installation take?
Professional installation typically takes 2-3 days: one day for prep and tile installation, one day for the adhesive to cure, and a final day for grouting and cleanup. Complex patterns or larger kitchens might take an extra day or two.